1 and 1 pop settings
Author: g | 2025-04-24
Assortment Premium Party Favors Toys Set: 2 Pop Bracelets,4 Pop Fidget Keychain,1 Cute Pop Fidget Keychain,1 Pop Fidget Ball,1 Cute Pop it ball,6 Mini Pop it Keychain,4 Finger

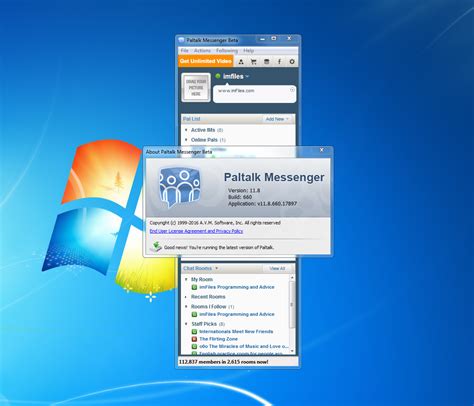
1 and 1 IMAP POP Server Settings For Outlook
Pro, if you want to use the MacBook Pro microphone and it’s assigned as channel 1 in Audio MIDI Setup, choose Input 1 from the input slot of the channel strip you're using to record. Open your application.Do the following depending on the application you're using:For Logic Pro, choose Logic Pro > Settings (or Preferences) > Audio, then select Devices.For GarageBand, choose GarageBand > Settings (or Preferences) > Audio/MIDI.For MainStage, choose MainStage > Settings (or Preferences) > Audio.Choose the Aggregate Device from the Output Device pop-up menu in Logic Pro or GarageBand, or the Audio Output pop-up menu in MainStage. Logic Pro and GarageBand automatically set the input device to the match the selected output device, which you can change if you want to use a different input device. In MainStage, you must select the input device manually.In Logic Pro, click Apply. You can record multiple tracks at once with an Aggregate device in GarageBand, such as a podcast with multiple USB mics: To set the inputs and outputs for your recording, choose GarageBand > Settings (or Preferences) > Audio/MIDI, then do the following:Click the Output Device pop-up menu, then choose the device your headphones are connected to. GarageBand can only output audio to a single device. If you want to use multiple headphones, you'll need a splitter or a headphone amplifier to send GarageBand audio to those headphones.Click the Input Device pop-up menu, then choose the Aggregate Device.Create several new audio tracks in your GarageBand project. Option-click any track header, choose Configure Track Header, then select Record Enable to add the record enable button to each track header.Select the track header of one of the new tracks, then click the Track button in the Smart Controls pane at the bottom of the window.In the Smart Controls pane, click Recording Settings, then set these options: Click the input button to set the channel to mono or stereo. Make sure you pick the correct format for the mic or instrument you're using.Click the input pop-up menu and choose the input source. These numbered channels correspond to the numbered channels in Audio MIDI Setup. Repeat the previous two steps for each track you want to record. Make sure each track has its own input source in GarageBand. For example, 1 USB mic might be assigned to channel 1 and another might be assigned to channel 2 in the Aggregate Device in Audio
1 and 1 IMAP POP Server Settings For Outlook, Android
How to Change Pop-up Blocker in Chrome?Are you tired of Chrome’s default pop-up blocker blocking essential websites or ads? Or perhaps you want to block specific websites from displaying pop-ups? Whatever your reason, changing the pop-up blocker in Chrome is a straightforward process. In this article, we’ll guide you through the steps to customize Chrome’s pop-up blocker to suit your needs.Why Change the Pop-up Blocker in Chrome?Before we dive into the process, let’s understand why you might want to change the pop-up blocker in Chrome:Blocking essential websites: Sometimes, websites require pop-ups to function properly. By changing the pop-up blocker, you can allow these websites to display pop-ups.Blocking specific websites: If you find certain websites annoying or intrusive, you can block their pop-ups specifically.Improving user experience: Customizing the pop-up blocker can enhance your browsing experience by allowing you to control which websites can display pop-ups.How to Change Pop-up Blocker in Chrome?Changing the pop-up blocker in Chrome is a simple process that can be done in a few steps:Method 1: Enabling/Disabling Pop-up BlockerTo enable or disable the pop-up blocker in Chrome, follow these steps:Open Chrome settings: Click on the three vertical dots in the upper right corner of the Chrome browser window and select Settings.Scroll down to advanced settings: Scroll down to the Advanced section.Click on Content settings: Click on Content settings under the Privacy and security section.Toggle pop-ups and redirects: Toggle the switch next to Pop-ups and redirects to On or Off depending on your preference.Method 2: Creating an ExceptionIf you want to allow specific websites to display pop-ups while blocking others, you can create an exception:Open Chrome settings: Click on the three vertical dots in the upper right corner of the Chrome browser window and select Settings.Scroll down to advanced settings: Scroll down to the Advanced section.Click on Content settings: Click on Content settings under the Privacy and security section.Click on Pop-ups and redirects: Click on Pop-ups and redirects.Click on Manage exceptions: Click on Manage exceptions.Add website: Enter the website you want to allow pop-ups from and click Add.Method 3: Using Third-Party ExtensionsIf you want more advanced pop-up blocking features, you can use third-party extensions:Search for extensions: Go to the Chrome Web Store and search for pop-up blocker or ad blocker.Install extension: Install the extension you want to use.Configure extension: Configure the extension to suit your needs.Troubleshooting Common IssuesIf you’re experiencing issues with Chrome’s pop-up blocker, here are some commonProblem set 1-3 - MCB 1 Problem Set 1 Answer
Made on the page.Don’t want to deal with the setup? Let us do the work for you! Check out our Done-For-You service and let us take care of the technical details so you can focus on your business.Step 3: Setting Up Pop-Ups’ TriggersNow you need to set up different triggers for the multiple pop-ups on your Clickfunnels page.As mentioned, Pop-up #1 will be triggered when a visitor tries to leave the page. However, the other pop-ups on the page need different triggers. You can use either buttons or text links for this.How to trigger a pop-up with a buttonAdd a button to your funnel page.Open the settings of the button and click Set Action.Select the Go To Website URL option and enter #cf-popup-NUMBER OF THE POP-UP.How to trigger a pop-up with a buttonHow to trigger a pop-up with a linkCreate a text element that will trigger a pop-up.Select the text and click the hyperlink icon from the settings bar.In the link field, enter #cf-popup-NUMBER OF THE POP-UP.How to trigger a pop-up with a text linkStep 4: Adding A ButtonThis step is needed only for technical purposes. This button will not be visible on your page.Add another button element to the page.Open the Settings of the button and click Set Action.Choose the Open The Pop-Up action.Hide this button by clicking on the Hide icon at the bottom of the settings window. This button is needed for the script to work properly and won’t show up on the page.Save the changes you made on the page.That’s how easy you can add multiple pop-ups to the same page in Clickfunnels with the help of CF Power Scripts.It’s only one of the features that CF Power Scripts offers to its users! Check out other scripts like multiple order bumps with images, complete Facebook and Google tracking, reCAPTCHA, and many more and add them to your funnel to improve performance and conversion. If you’ve found this content helpful and would like to support the blog, consider subscribing by clicking here. Your support is greatly appreciated!. Assortment Premium Party Favors Toys Set: 2 Pop Bracelets,4 Pop Fidget Keychain,1 Cute Pop Fidget Keychain,1 Pop Fidget Ball,1 Cute Pop it ball,6 Mini Pop it Keychain,4 Finger1 1/2 - 1 3/4 Bulk 48 Pc. Mini Easter Lotsa Pops Pop
Way to use Gmail on multiple email clients is to use IMAP. If you need to use POP instead of IMAP, set up 'Recent mode'. Recent mode shows your past 30 days of emails from Gmail. Step 1: Turn on recent mode On your email client's POP settings page, find the 'Email address' or 'Username' field. Add recent: in front of your email address. For example, recent:[email protected]. Step 2: Change your POP settings Change your POP settings so that your emails are left on the server. Outlook: Go to your accounts, click Advanced Leave a copy of messages on the server. Apple Mail: On the 'Advanced' tab, untick the box next to 'Remove copy from server after retrieving a message', if available. Thunderbird: On the 'Server settings' tab, tick the box next to 'Leave messages on server'. 'Account exceeded POP command or bandwidth limits' error If you see the 'Account exceeded POP command or bandwidth limits error', it's usually because your POP clients have been accessing your Gmail account too frequently. To fix this, change your client's settings so it won't check for new messages too frequently. I can't send emails If emails that you've sent in your email client are stuck in your outbox, try these fixes: If you're sending emails through Apple Mail and you currently have 'smtp.gmail.com:[email protected]' in the 'Outgoing mail server:' field of your settings, try changing the field to 'smtp.gmail.com' instead. Make sure that your SMTP settings don't have recent: on your email address. My7 1/2 - 11 1/2 Lotsa Pops Pop Fidget Toy
This chapter is from the book Specifying Basic Composition SettingsIn the Composition Settings dialog, you can select the settings that match video formats from a pop-up menu of presets. For a brief explanation of some common presets, see Table 4.1. Choosing a preset automatically enters the selected format’s intrinsic attributes, including frame size, PAR, and frame rate. You just have to enter the composition name, viewing resolution, start timecode, and duration.Table 4.1. Common Composition Presets FRAME PRESET FRAME SIZE PAR FRAME RATE USE NTSC DV 720 × 480 .91 29.97 DV standard for North America NTSC D1 720 × 486 .91 29.97 Broadcast standard for North America HDTV 1920 × 1080 1 24 High-definition standard using 16:9 image aspect ratio Film (2k) 2048 × 1536 1 24 Film transfers Cineon Full 3656 × 2664 1 24 Film transferred using the Cineon file format However, you don’t always set a composition’s settings to match an export format. To create an intermediate composition, for example, you might specify custom values for the following settings: Width and Height—Enter values to set the comp’s frame size (the viewing area of the Composition panel) in pixels. You may position layers outside the viewing area, but only layers within this frame are rendered for previews and export. Lock Aspect Ratio to—Select this option to maintain the ratio of the Width and Height so that entering one value calculates the other value automatically. Pixel Aspect Ratio—In the pop-up, choose the format you want the comp’s pixel aspect ratio (or PAR) to match. An image’s pixel aspect ratio is the ratio of each of its pixel’s width to height and appears next to the format’s name in parentheses. Square pixels have a PAR of 1:1, or simply 1. Other formats use nonsquare pixels, with various PARs. The DVCPro HD 720 format, for example, has a PAR of 1.33. Frame Rate—Enter the number of frames per second (fps) displayed by the comp during playback. Usually, the frame rate you choose matches the frame rate of your output format. Resolution—In the pop-up menu, choose the fraction of the comp’s total number of pixels to be rendered in the Composition panel’s viewer. The Full setting renders all the comp’s pixels, ½ renders every other pixel, and so on. Smaller fractions reduce image quality and the time it takes to render the image. While you work, you can change a comp’s resolution easily by using the Comp panel’s Resolution pop-up menu. (Footage and Layer panels also include a Resolution pop-up menu.) Start Timecode—Enter the number from which the time of the comp is counted. By default, a comp’s time starts at 0, but you can set it to start at any number. Duration—Enter the length of the composition. You can change a comp’s duration at any time, lengthening it to accommodate more layers or cutting it to the total duration of its layers.To select a composition preset: In the Composition Settings dialog, choose an option from the Preset menu (Figure 4.5).Police Station Pop-Up Diorama 1/12 – Extreme-Sets
How to Off Pop Up Blocker in Internet Explorer?As the popularity of the internet continues to grow, pop-up blockers have become an essential tool for many internet users. These blockers are designed to prevent unwanted advertisements and other pesky windows from appearing on your screen. However, sometimes, you may want to allow certain pop-ups to open, such as those needed for a specific website or application. In this article, we will guide you on how to turn off the pop-up blocker in Internet Explorer and allow certain pop-ups to open.Why Disable Pop-up Blocker in Internet Explorer?There are several reasons why you may want to disable the pop-up blocker in Internet Explorer. Some of these reasons include:Allowing necessary pop-ups: Certain websites or applications may require you to enable pop-ups to function properly. For example, online banking sites or online gaming platforms may require you to allow pop-ups to access their services.Allowing website-specific pop-ups: If you encounter a website that is blocked by the pop-up blocker and you still want to access it, you may need to allow pop-ups specifically for that website.Avoiding false positives: In some cases, the pop-up blocker may incorrectly block a legitimate pop-up window. Disabling the blocker can help you access the pop-up window and ensure that you can access the website or application.How to Off Pop-up Blocker in Internet Explorer?To turn off the pop-up blocker in Internet Explorer, follow these steps:Method 1: Using the ToolbarLaunch Internet Explorer: Open Internet Explorer on your computer or mobile device.Click on the toolbar: Click on the "Tools" icon () or press the "Alt" key to access the toolbar.Select Internet Options: From the toolbar, select "Internet Options" from the drop-down menu.Click on the Security Tab: In the Internet Options window, click on the "Security" tab.Click on the Custom Level Button: In the Security tab, click on the "Custom Level" button.Allow Pop-ups: In the Custom Level window, scroll down and select "Allow" from the drop-down menu for the "Script ActiveX controls marked as safe" option.Click OK: Click OK to save your changes.Method 2: Using the Settings AppNote: This method only applies to Windows 10.Launch Settings App: Open the Settings app on your Windows 10 device.Click on Apps: Click on "Apps" from the list of settings options.Click on Internet Explorer: In the Apps window, click on "Internet Explorer" from the list of installed apps.Click on Advanced: In the Internet Explorer settings window, click onPolice Station Pop-Up Diorama 1/18 – Extreme-Sets
You can open your messages from Gmail in other email clients that support POP, such as Microsoft Outlook.Step 1: Make sure that POP is the best way to read your emails IMAP and POP are both ways of reading your Gmail messages in other email clients. IMAP can be used across multiple devices. Emails are synced in real time. POP can only be used for a single computer. Emails aren't synced in real time. Instead, they're downloaded and you decide how often you want to download new emails.Step 2: Set up POPFirst, set up POP in GmailImportant: After you've turned on POP in Gmail, it may take some time to download your messages to your email client. On your computer, open Gmail. At the top right, click Settings See all settings. Click on the Forwarding and POP/IMAP tab. In the 'POP Download' section, select: Enable POP for all emails (even emails that have already been downloaded) Enable POP for emails that arrive from now on Under 'When messages are accessed with POP', select what happens to Gmail's copy of the message: Keep Gmail's copy in the inbox Mark Gmail's copy as read Archive Gmail's copy Delete Gmail's copy At the bottom of the page, click Save changes.Next, make changes to your email clientGo to your client – such as Microsoft Outlook – and check these settings. Incoming mail (POP) server pop.gmail.com Requires SSL: Yes Port: 995 Outgoing mail (SMTP) server smtp.gmail.com Requires SSL: Yes Requires TLS: Yes (if available) Requires. Assortment Premium Party Favors Toys Set: 2 Pop Bracelets,4 Pop Fidget Keychain,1 Cute Pop Fidget Keychain,1 Pop Fidget Ball,1 Cute Pop it ball,6 Mini Pop it Keychain,4 Finger
Police Station Pop-Up Diorama 1/12 Extreme-Sets
CF Power Scripts Learn how you can add multiple pop-ups to the same page in Clickfunnels in as little as a few minutes without any specific tech skills. In this article, you’ll learn how to add multiple pop-ups to the same funnel step in Clickfunnels. Pop-ups in Clickfunnels provide another way to collect information from your visitors. They can be shown either at the click of a button or link or when a visitor tries to exit the page.You can use multiple pop-ups on the same Clickfunnels page to show your visitors different information depending on which button or text link they click.Affiliate Disclosure: This post contains affiliate links. If you click and sign up or make a purchase, we may earn a commission at no extra cost to you. Thank you for your support!By default, Clickfunnels only allows you to add one pop-up to the page. So, if you want to use multiple pop-ups on the page, you’ll need to use custom code (if you have the required skills) or a third-party solution. The easiest and fastest way would be to use CF Power Scripts.CF Power Scripts is the #1 add-on for Clickfunnels, which lets you integrate additional features to your funnels that Clickfunnels doesn’t offer out of the box.To add multiple pop-ups to your funnel page, you’ll need to use the CF Multi Pop-Up Power Script. You can either watch our step-by-step video tutorial with the setup instructions or follow the steps below.Step 1: Adding CF Multi Pop-Up Script To The FunnelLog in to your CF Power Scripts account and go to the Power Scripts tab.Select the funnel and the funnel step where you want to add the script.Click Add New and select the CF Multi Pop-Up Power Script from the list.It'll open the settings for the CF Multi Pop-Up Power Script. You can prevent the pop-up from scrolling to top by selecting Yes in the dropdown.After that, click Add Script to add it to your funnel.Step 2: Creating Multiple Pop-Ups In ClickfunnelsOpen the page where you want to add multiple pop-ups in the Clickfunnels page editor.Go to Pop-Up, and click Show Pop-Up.You’ll see multiple pop-up elements that later will show up on your Clickfunnels page. To create an additional pop-up, you just need to create a different row in the pop-up area.If you’re using an exit-intent pop-up that is triggered on exit, the pop-up that you define as Pop-Up #1 will serve as the exit-intent pop-up.Add content to the pop-ups.For each pop-up row, go to the Settings and open the CSS Info by clicking on the hashtag icon in the bottom right corner. Change the title to cf-popup-NUMBER OF THE POP-UP and click Update.Save the changes youEmail Account Setup on Microsoft Outlook Using POP Settings 1
You can enjoy the same game on multiple devices by synchronizing your progress using your Facebook, Google or Apple ID account!Cross-platform synchronization is available between iOS, Android, Windows and macOS devices 📲 🌱 Each device must have the same game version.🌱 Your devices must meet system requirements.🌱 You can't play on several devices at once - synchronization doesn't occur in real-time!Here's how:🌼 Using Facebook:1. Connect your Facebook in the game Settings ⚙️ or title screen.2. Install the game on your new device.3. Connect the new game to the same Facebook account used on your first device.4. Tap/click "Select" on the "On Server" pop-up window.5. Type OK and press Confirm.🌼 Using your Apple ID (iOS 13.0/macOS 10.15 or higher):1. Connect your Apple ID in the game Settings ⚙️ or title screen.2. Install the game from the App Store on your new device.3. Connect the new game to the same Apple ID used on your first device.4. Tap/click "Select" on the "On Server" pop-up window.5. Type OK and press Confirm.🌼 Using your Google account (Android devices):1. Connect your Google account in the game Settings ⚙️ or title screen.2. Install the game on your new device.3. Connect the new game to the same Google account used on your other device.4. Tap/click "Select" on the "On Server" pop-up window.5. Type OK and press Confirm.If you need assistance, just contact our Customer Support 😊PLEASE NOTE: 🌱 Unfortunately, cross-platform synchronization is unavailable on our Facebook platform.🌱 Be careful when selecting the game you'd like to sync, especially after making a purchase or receiving a reward.🌱 If you notice a difference in progress between synchronized devices, check this helpful article.🌱 Please be aware that access to Facebook programs and services can be restricted in certain countries or regions. In such cases, we comply with local laws and regulations.. Assortment Premium Party Favors Toys Set: 2 Pop Bracelets,4 Pop Fidget Keychain,1 Cute Pop Fidget Keychain,1 Pop Fidget Ball,1 Cute Pop it ball,6 Mini Pop it Keychain,4 Finger B. Setting Up POP. Follow the tutorial below to set up a mail message server using POP: 1. Perform steps 1 and 2 as mentioned in the IMAP section above. 2. In the POP1 For 1 Set Menu - Peach Garden
With. Click Continue to builder. If you receive a message that your pop-up is disabled, click Edit and toggle the slider to enable the pop-up.Click Layout, then choose a GDPR-supported pop-up form layout. They'll have a Supports GDPR label. Note GDPR fields aren't compatible with form integrations. Set up your GDPR-friendly signup form To use GDPR fields on your signup forms, enable them for each audience that collects or contains personal data from EU citizens, then edit them to reflect your marketing practices.Enable and edit GDPR fieldsAfter you enable GDPR fields for an audience, they’ll be available to view and edit. These fields will be included on your audience's pop-up forms, hosted signup form, embedded forms, and signup landing pages.To enable and edit GDPR fields for your audience, follow these steps.Click Audience, then click All contacts. If you have more than 1 audience, click the Audience drop-down and choose the one you want to work with.Click Settings. In the Form settings section, toggle the slider to enable GDPR fields on signup forms. Click Configure GDPR settings. Enter your title, description, and marketing preferences. If you want your contacts to choose an option before they subscribe, check the box for Require at least one option to be selected. Edit the legal text, if needed.When you're ready, click Save GDPR settings. You’re all set! After your forms are in use, be careful about any further edits you make. If you change a checkbox option, the consent you received before making the change won't be valid, and you’ll need to reconfirm opt-in. If you want to change your form, we suggest that you add a new option or remove an old one. After you enable GDPR fields, you can also edit them from the form builder. The changes you make in the form builder will apply to most Mailchimp signup forms, including compatible pop-up forms and landing pages.To edit GDPR fields from the form builder, follow these steps.Click Audience, then click Signup forms. Scroll to the Form builder tile, then click Manage forms.If you have more than 1 audience, click the Audience drop-down and choose the one you want to work with. Scroll to find Marketing Permissions and click the section. On the Field settings tab, edit your GDPR fields. If you want your contacts to choose an option before they subscribe, check the box next to Require at least one option. Edit the Legal text, if needed. When you’re ready, click Save Fields. Segment your audience by marketing permissions After you’ve set up your marketing permission checkboxes, segment your audience to make sure you send your email only to the people who have given consent through your signup form.To create and save a segment in your audience, follow these steps.Click Audience, then click All contacts. If you have more than 1 audience, click the Audience drop-down and choose the one you want to work with. Click Create new segment. In the first drop-down, choose your GDPR form field label. By default, it’sComments
Pro, if you want to use the MacBook Pro microphone and it’s assigned as channel 1 in Audio MIDI Setup, choose Input 1 from the input slot of the channel strip you're using to record. Open your application.Do the following depending on the application you're using:For Logic Pro, choose Logic Pro > Settings (or Preferences) > Audio, then select Devices.For GarageBand, choose GarageBand > Settings (or Preferences) > Audio/MIDI.For MainStage, choose MainStage > Settings (or Preferences) > Audio.Choose the Aggregate Device from the Output Device pop-up menu in Logic Pro or GarageBand, or the Audio Output pop-up menu in MainStage. Logic Pro and GarageBand automatically set the input device to the match the selected output device, which you can change if you want to use a different input device. In MainStage, you must select the input device manually.In Logic Pro, click Apply. You can record multiple tracks at once with an Aggregate device in GarageBand, such as a podcast with multiple USB mics: To set the inputs and outputs for your recording, choose GarageBand > Settings (or Preferences) > Audio/MIDI, then do the following:Click the Output Device pop-up menu, then choose the device your headphones are connected to. GarageBand can only output audio to a single device. If you want to use multiple headphones, you'll need a splitter or a headphone amplifier to send GarageBand audio to those headphones.Click the Input Device pop-up menu, then choose the Aggregate Device.Create several new audio tracks in your GarageBand project. Option-click any track header, choose Configure Track Header, then select Record Enable to add the record enable button to each track header.Select the track header of one of the new tracks, then click the Track button in the Smart Controls pane at the bottom of the window.In the Smart Controls pane, click Recording Settings, then set these options: Click the input button to set the channel to mono or stereo. Make sure you pick the correct format for the mic or instrument you're using.Click the input pop-up menu and choose the input source. These numbered channels correspond to the numbered channels in Audio MIDI Setup. Repeat the previous two steps for each track you want to record. Make sure each track has its own input source in GarageBand. For example, 1 USB mic might be assigned to channel 1 and another might be assigned to channel 2 in the Aggregate Device in Audio
2025-04-13How to Change Pop-up Blocker in Chrome?Are you tired of Chrome’s default pop-up blocker blocking essential websites or ads? Or perhaps you want to block specific websites from displaying pop-ups? Whatever your reason, changing the pop-up blocker in Chrome is a straightforward process. In this article, we’ll guide you through the steps to customize Chrome’s pop-up blocker to suit your needs.Why Change the Pop-up Blocker in Chrome?Before we dive into the process, let’s understand why you might want to change the pop-up blocker in Chrome:Blocking essential websites: Sometimes, websites require pop-ups to function properly. By changing the pop-up blocker, you can allow these websites to display pop-ups.Blocking specific websites: If you find certain websites annoying or intrusive, you can block their pop-ups specifically.Improving user experience: Customizing the pop-up blocker can enhance your browsing experience by allowing you to control which websites can display pop-ups.How to Change Pop-up Blocker in Chrome?Changing the pop-up blocker in Chrome is a simple process that can be done in a few steps:Method 1: Enabling/Disabling Pop-up BlockerTo enable or disable the pop-up blocker in Chrome, follow these steps:Open Chrome settings: Click on the three vertical dots in the upper right corner of the Chrome browser window and select Settings.Scroll down to advanced settings: Scroll down to the Advanced section.Click on Content settings: Click on Content settings under the Privacy and security section.Toggle pop-ups and redirects: Toggle the switch next to Pop-ups and redirects to On or Off depending on your preference.Method 2: Creating an ExceptionIf you want to allow specific websites to display pop-ups while blocking others, you can create an exception:Open Chrome settings: Click on the three vertical dots in the upper right corner of the Chrome browser window and select Settings.Scroll down to advanced settings: Scroll down to the Advanced section.Click on Content settings: Click on Content settings under the Privacy and security section.Click on Pop-ups and redirects: Click on Pop-ups and redirects.Click on Manage exceptions: Click on Manage exceptions.Add website: Enter the website you want to allow pop-ups from and click Add.Method 3: Using Third-Party ExtensionsIf you want more advanced pop-up blocking features, you can use third-party extensions:Search for extensions: Go to the Chrome Web Store and search for pop-up blocker or ad blocker.Install extension: Install the extension you want to use.Configure extension: Configure the extension to suit your needs.Troubleshooting Common IssuesIf you’re experiencing issues with Chrome’s pop-up blocker, here are some common
2025-04-21Way to use Gmail on multiple email clients is to use IMAP. If you need to use POP instead of IMAP, set up 'Recent mode'. Recent mode shows your past 30 days of emails from Gmail. Step 1: Turn on recent mode On your email client's POP settings page, find the 'Email address' or 'Username' field. Add recent: in front of your email address. For example, recent:[email protected]. Step 2: Change your POP settings Change your POP settings so that your emails are left on the server. Outlook: Go to your accounts, click Advanced Leave a copy of messages on the server. Apple Mail: On the 'Advanced' tab, untick the box next to 'Remove copy from server after retrieving a message', if available. Thunderbird: On the 'Server settings' tab, tick the box next to 'Leave messages on server'. 'Account exceeded POP command or bandwidth limits' error If you see the 'Account exceeded POP command or bandwidth limits error', it's usually because your POP clients have been accessing your Gmail account too frequently. To fix this, change your client's settings so it won't check for new messages too frequently. I can't send emails If emails that you've sent in your email client are stuck in your outbox, try these fixes: If you're sending emails through Apple Mail and you currently have 'smtp.gmail.com:[email protected]' in the 'Outgoing mail server:' field of your settings, try changing the field to 'smtp.gmail.com' instead. Make sure that your SMTP settings don't have recent: on your email address. My
2025-04-01