Install 7zip
Author: c | 2025-04-24
How to Install 7Zip on Windows 11. Installing 7Zip on Windows 11 is a straightforward process that can be completed in just a few steps. Follow the instructions below to install 7Zip on your Windows 11 computer: Step 1: Download the 7Zip Installer. The first step to installing 7Zip on Windows 11 is to download the 7Zip installer from the
Can't install 7zip, 7zip already installed? 16 - GitHub
Earliest convenience.4️⃣ Use the following syntax to install one or multiple packages at once.choco install pkg1 pkg2 -yFor example, to install the 7zip package from the default repository, run:PS C:\WINDOWS\system32> choco install 7zip opera -yInstalling the following packages: 7zipBy installing, you accept licenses for the packages.Progress: Downloading 7zip.install 22.1... 100%Progress: Downloading 7zip 22.1... 100%7zip.install v22.1 [Approved]7zip.install package files install completed. Performing other installation steps.Installing 64 bit versionInstalling 7zip.install...7zip.install has been installed.7zip installed to 'C:\Program Files\7-Zip'Added C:\ProgramData\chocolatey\bin\7z.exe shim pointed to 'c:\program files\7-zip\7z.exe'. 7zip.install can be automatically uninstalled. The install of 7zip.install was successful. Software installed to 'C:\Program Files\7-Zip'7zip v22.1 [Approved]7zip package files install completed.5️⃣ If you’ve not familiar with command line. The GUI app is available in the Chocolatey community repository and allows users to perform most of the tasks available using the CLI. The GUI simplifies the process for users not accustomed to using the CLI.To install the Chocolatey GUI, run the below command:choco install chocolateygui -y6️⃣ Chocolatey supports upgrades the installed apps. The upgrade command upgrades the specified package or list of packages. If the package is not installed, upgrade installs it instead.PS C:\> choco upgrade 7zip -yChocolatey v2.2.2Upgrading the following packages:7zipBy upgrading, you accept licenses for the packages.7zip is not installed. Installing...Progress: Downloading 7zip 23.1.0... 100%7zip v23.1.0 [Approved]7zip package files upgrade completed. Performing other installation steps. The upgrade of 7zip was successful. Software installed to 'C:\ProgramData\chocolatey\lib\7zip'Chocolatey upgraded 1/1 packages. See the log for details (C:\ProgramData\chocolatey\logs\chocolatey.log).In case if you want to update all the installed apps using Chocolatey package manger. Add the all flag to the upgrade command to update all packages at once.
7zip - How to Download, Install and Use 7zip - YouTube
7zip is a free and open-source software used to compress and uncompress files and is one of the more popular compression tools that use 7z file format. This tool can read and write to other file formats. In this article, we will teach you how to install 7zip on AlmaLinux and Rocky Linux. You can visit the packages available in Eldernode if you wish to purchase a Linux VPS server.Table of Contents Tutorial Install 7zip on AlmaLinux and Rocky Linux7zip FeaturesInstalling 7zip on AlmaLinux and Rocky Linux 8How to Use 7zip on AlmaLinux and Rocky LinuxConclusion7zip is a compressed archive format that has a higher speed than other types of compression formats and was ranked first in an experiment conducted between different types of compression formats.7zip Features– Has self-extracting capability for 7z file format– Has a compression ratio of about 2-10% better than other– similar tools– Supports 87 languages– Use strong AES-256 encryptionInstalling 7zip on AlmaLinux and Rocky Linux 87zip is not enabled by default on most Linux distributions. The 7zip package in Linux distributions is called p7zip. So there is no installation candidate to start with 7zip.There are three 7zip packages: p7zip, p7zip-full and p7zip-rar. The p7zip-rar package supports RAR files along with 7z. Installing p7zip-full is sufficient in most cases, but you can also install p7zip-rar to further support the rar file.You should update your system database:sudo dnf update -yYou must then enable the Epel repository using the following command:sudo dnf install epel-releaseFinlly, you can now easily install 7-Zip by running the following command:sudo dnf install p7zip p7zip-pluginsTo ensure the correct installation of 7-Zip, you can verify it using the following command:7zHow to Use 7zip on AlmaLinux and Rocky LinuxNow you should select any file to make a compressed file by using 7zip. You need to the following command to show the list of all files and folders of the current directory:ls -laYou can create a compressed file with the help of the following command. Option a in the command is for compression.7z a data.7z data.txtNow the following command to display a list of detailed information of each archive file:7z l data.7zIn this step, you need to extract the files and folders:7z e data.7zConclusion7zip archiver is an efficient tool for compressing and decompressing essential files and folders, and it can be used to transfer large amounts of data. This article taught you how to install 7zip on AlmaLinuxHow to install 7zip - YouTube
This article describes how to install the Wireless Communication Library frameworks and start using them with your IDE. You can download each framework as an executable installer or as a 7Zip archive. To unzip the 7Zip archived framework, use 7-ZIP. If you are having any problems or have any questions about installing framework, please do not hesitate to contact us. Installing from executable installer Installing from 7Zip archive Registered Version Before installing a registered version of the framework, make sure you completely uninstalled a demo version. If you use .NET Edition, make sure you delete all the framework assemblies completely. Visual Studio usually copies third-party assemblies into a project's build folder. And even after installing a registered version and running your project, it may still use a demo version. Before using a registered version, make sure you clear your project's build folder. .NET Assemblies Bluetooth Framework wclCommon.dll wclCommunication.dll wclDri.dll wclBluetoothFramework.dll IrDA Framework wclCommon.dll wclCommunication.dll IrDAFramework.dll Serail Framework wclCommon.dll wclCommunication.dll wclSerialFramework.dll Timeline Framework wclCommon.dll wclTimelineFramework.dll WiFi Framework wclCommon.dll wclDri.dll wclWiFiFramework.dll Installing from executable installer If you downloaded a demo EXE or registered version of the Wireless Communication Library framework, you have to unpack it first. We use a standard ZIP archive for this so it can be unpacked by standard Windows Explorer. Once you get the framework's executable installer file (EXE file), simply run it and follow the installation instructions. Unpack Executable Installer However, there can be a situation when you can not (or do not want) to use an executable installer for any reason. And you need to install the registered version of the framework, which is redistributed as an executable installer only. In this case you can unpack the installer and get the framework's files. The executable installer is built using Inno Setup, so to unpack it, simply use Inno Unpacker. To unpack the framework executable installer with Inno Unpacker, use one of the commands below: Demo version: innounp framework_installer_name -x Registered version: innounp framework_installer_name -x -pPWD where framework_installer_name is the executable installer name; PWD is the password for the registered framework. When the command completes, you will find a folder named as "{app}" and all the framework's files inside this folder. If you unpacked the 7Zip-archived framework, you simply get the framework's files. After that, refer to the Installing Framework from 7Zip Archive part. Installing from 7Zip Archive If you already have any previous installation of the framework or you already have any other copy of our framework, just copy the unpacked files into the same folder where the previous version or other framework is located with overriding existing files. At this step you have the framework ready for installation into your IDE. The framework package contains the following directories: Demo - the framework's sample projects (applications); Doc - the framework's off-line documentation; Lib - the framework's binaries. May contains different files and directories depending on the framework's edition (.NET, C++, VCL); Source - the framework's source code (not available in .NET Edition except .NET Edition with source. How to Install 7Zip on Windows 11. Installing 7Zip on Windows 11 is a straightforward process that can be completed in just a few steps. Follow the instructions below to install 7Zip on your Windows 11 computer: Step 1: Download the 7Zip Installer. The first step to installing 7Zip on Windows 11 is to download the 7Zip installer from theInstall 7zip on macOS with MacPorts
I am currently using windows server 2019 CLI running on virtualbox.I need to Zip a folder and set a password, but obviously windows does not support this which means I need to download a third party software like 7ZIP in order to do so.But the problem is I have no idea how im supposed to install 7zip using command line without access to a user interface. Any advice on how i could install 7zip through cmd? Thanks. asked May 25, 2021 at 16:31 You may install 7Zip without the GUI by using the "silent" option when installing.This will use the default installation values.Silent install is done in a Command Prompt (cmd) that is run as Admin.Use the following example command:7z1900-x64.exe /SThe /S parameter stands for Silent installation. answered May 25, 2021 at 16:58 You can do this with powershell using the following:$client = new-object System.Net.WebClient$client.DownloadFile(" the url with the link to 7zip and file path to where you want it downloaded. answered May 25, 2021 at 16:40 pextrispextris3512 silver badges8 bronze badges You must log in to answer this question. Start asking to get answers Find the answer to your question by asking. Ask question Explore related questions See similar questions with these tags.how to Install 7zip tool
CHDconvertConverts a directory containing ".gz", ".7z" and ".zip" files into a directory containing ".chd" files, usually for purposes of console emulation.Requirements (Included with Linux/Mac)PythonGitInstallationPlease select either Method A or Method B to install CHDconvert.Method A: Clone CHDconvertgit clone directory to where you cloned repo (in previous step)cd C:\Where\you\cloned\this\repoInstall requirementspip install -r requirements.txtMethod B: Download Release CHDconvert.7z and change directory to where you unzippedcd C:\Where\you\unzipped\the\releaseInstall requirementspip install -r requirements.txtLinux AdditionalsSome Linux distributions can give you chdman via aptitude with the mame-tools package.Use your distro's package/download manager to get mame-tools (for chdman).eg. Debian-variants using aptsudo apt install mame-toolsUsageExamples:Simply run it, and provide the folder path when it asks for it.Converts every .7z file in given path to chd. Extracts first, outputs to folder name + "_tmp", then converts and output to folder name + "_out"Provide a folder path as an argpython .\chdconvert.py C:\Where\the\7zip\files\liveDoes the same as the aboveProvide the delete arg ("-d" or "--delete")python .\chdconvert.py C:\Where\the\7zip\files\live --deleteSame as above, except it deletes the intermediary "folder_tmp" directoryProvide the replace arg ("-r" or "--replace")python .\chdconvert.py C:\Where\the\7zip\files\live --replaceReplaces the 7zip file, deleting the original as well as the intermediary files in "folder_tmp"ShoutoutsThanks CHDMAN!Install 7Zip On Windows Xp
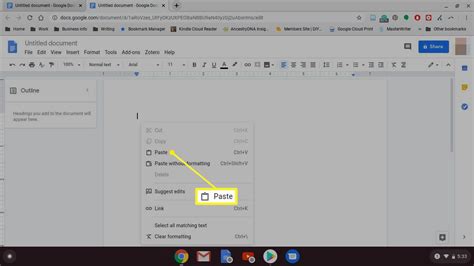
Certainly! Here's a concise explanation along with a code snippet:"Using 7zip in PowerShell allows you to easily compress and decompress files with simple commands for efficient file management."# Example of compressing a folder named 'MyFiles' to 'MyFiles.7z'& "C:\Program Files\7-Zip\7z.exe" a "MyFiles.7z" "C:\Path\To\MyFiles\*"Getting Started with 7zipWhat is 7zip?7zip is a popular open-source file archiver widely used for its impressive compression ratios and versatility in handling various file formats. Supporting a range of formats such as .7z, .zip, .tar, .gzip, .bzip2, and more, it allows users not only to compress files but also to create archives for better organization and storage efficiency. Its usability in both command-line and graphical user interface (GUI) makes it accessible for both novice and advanced users.Installing 7zipTo begin using 7zip in PowerShell, you first need to install the application on your Windows machine. Follow these steps:Visit the official [7zip website]( and download the installer suitable for your system architecture (32-bit or 64-bit).Run the installer and follow the prompts to complete the installation process.After installation, you can verify its successful installation by navigating to the installation directory, typically found in `C:\Program Files\7-Zip`.To make it easier to call 7zip from PowerShell, it’s advisable to add it to the system PATH.Accessing 7zip via PowerShellOnce installed, calling 7zip from PowerShell is straightforward. You can do this by specifying the full path to `7z.exe`:& "C:\Program Files\7-Zip\7z.exe"This command invokes the 7zip executable, allowing you to use its features right from your PowerShell prompt.Setting Environment VariablesFor easier access to 7zip from PowerShell, adding 7zip to your environment variables is a smart move. You can do this using the following command in PowerShell:$env:Path += ";C:\Program Files\7-Zip"This command updates the PATH environment variable, making the command `7z` callable directly without needing the full path.Mastering NotIn in PowerShell for Efficient FilteringBasic 7zip Commands in PowerShellCompressing FilesTo compress files using 7zip in PowerShell, you can follow the structure of the `7z a` command, where `a` stands for "add." Here’s an example that illustrates how to create a compressed archive named `archive.7z` from two text files `file1.txt` and `file2.txt`:& "7z.exe" a "archive.7z" "file1.txt" "file2.txt"In this command:`a` tells 7zip to add files to an archive.The first argument (`"archive.7z"`) is the name of the archive to be created.The subsequent arguments are the files to be included in that archive.Extracting FilesExtracting files from an existing archive is just as simple. You can use the `x` command, which stands for "extract." For instance,. How to Install 7Zip on Windows 11. Installing 7Zip on Windows 11 is a straightforward process that can be completed in just a few steps. Follow the instructions below to install 7Zip on your Windows 11 computer: Step 1: Download the 7Zip Installer. The first step to installing 7Zip on Windows 11 is to download the 7Zip installer from theComments
Earliest convenience.4️⃣ Use the following syntax to install one or multiple packages at once.choco install pkg1 pkg2 -yFor example, to install the 7zip package from the default repository, run:PS C:\WINDOWS\system32> choco install 7zip opera -yInstalling the following packages: 7zipBy installing, you accept licenses for the packages.Progress: Downloading 7zip.install 22.1... 100%Progress: Downloading 7zip 22.1... 100%7zip.install v22.1 [Approved]7zip.install package files install completed. Performing other installation steps.Installing 64 bit versionInstalling 7zip.install...7zip.install has been installed.7zip installed to 'C:\Program Files\7-Zip'Added C:\ProgramData\chocolatey\bin\7z.exe shim pointed to 'c:\program files\7-zip\7z.exe'. 7zip.install can be automatically uninstalled. The install of 7zip.install was successful. Software installed to 'C:\Program Files\7-Zip'7zip v22.1 [Approved]7zip package files install completed.5️⃣ If you’ve not familiar with command line. The GUI app is available in the Chocolatey community repository and allows users to perform most of the tasks available using the CLI. The GUI simplifies the process for users not accustomed to using the CLI.To install the Chocolatey GUI, run the below command:choco install chocolateygui -y6️⃣ Chocolatey supports upgrades the installed apps. The upgrade command upgrades the specified package or list of packages. If the package is not installed, upgrade installs it instead.PS C:\> choco upgrade 7zip -yChocolatey v2.2.2Upgrading the following packages:7zipBy upgrading, you accept licenses for the packages.7zip is not installed. Installing...Progress: Downloading 7zip 23.1.0... 100%7zip v23.1.0 [Approved]7zip package files upgrade completed. Performing other installation steps. The upgrade of 7zip was successful. Software installed to 'C:\ProgramData\chocolatey\lib\7zip'Chocolatey upgraded 1/1 packages. See the log for details (C:\ProgramData\chocolatey\logs\chocolatey.log).In case if you want to update all the installed apps using Chocolatey package manger. Add the all flag to the upgrade command to update all packages at once.
2025-03-287zip is a free and open-source software used to compress and uncompress files and is one of the more popular compression tools that use 7z file format. This tool can read and write to other file formats. In this article, we will teach you how to install 7zip on AlmaLinux and Rocky Linux. You can visit the packages available in Eldernode if you wish to purchase a Linux VPS server.Table of Contents Tutorial Install 7zip on AlmaLinux and Rocky Linux7zip FeaturesInstalling 7zip on AlmaLinux and Rocky Linux 8How to Use 7zip on AlmaLinux and Rocky LinuxConclusion7zip is a compressed archive format that has a higher speed than other types of compression formats and was ranked first in an experiment conducted between different types of compression formats.7zip Features– Has self-extracting capability for 7z file format– Has a compression ratio of about 2-10% better than other– similar tools– Supports 87 languages– Use strong AES-256 encryptionInstalling 7zip on AlmaLinux and Rocky Linux 87zip is not enabled by default on most Linux distributions. The 7zip package in Linux distributions is called p7zip. So there is no installation candidate to start with 7zip.There are three 7zip packages: p7zip, p7zip-full and p7zip-rar. The p7zip-rar package supports RAR files along with 7z. Installing p7zip-full is sufficient in most cases, but you can also install p7zip-rar to further support the rar file.You should update your system database:sudo dnf update -yYou must then enable the Epel repository using the following command:sudo dnf install epel-releaseFinlly, you can now easily install 7-Zip by running the following command:sudo dnf install p7zip p7zip-pluginsTo ensure the correct installation of 7-Zip, you can verify it using the following command:7zHow to Use 7zip on AlmaLinux and Rocky LinuxNow you should select any file to make a compressed file by using 7zip. You need to the following command to show the list of all files and folders of the current directory:ls -laYou can create a compressed file with the help of the following command. Option a in the command is for compression.7z a data.7z data.txtNow the following command to display a list of detailed information of each archive file:7z l data.7zIn this step, you need to extract the files and folders:7z e data.7zConclusion7zip archiver is an efficient tool for compressing and decompressing essential files and folders, and it can be used to transfer large amounts of data. This article taught you how to install 7zip on AlmaLinux
2025-04-19I am currently using windows server 2019 CLI running on virtualbox.I need to Zip a folder and set a password, but obviously windows does not support this which means I need to download a third party software like 7ZIP in order to do so.But the problem is I have no idea how im supposed to install 7zip using command line without access to a user interface. Any advice on how i could install 7zip through cmd? Thanks. asked May 25, 2021 at 16:31 You may install 7Zip without the GUI by using the "silent" option when installing.This will use the default installation values.Silent install is done in a Command Prompt (cmd) that is run as Admin.Use the following example command:7z1900-x64.exe /SThe /S parameter stands for Silent installation. answered May 25, 2021 at 16:58 You can do this with powershell using the following:$client = new-object System.Net.WebClient$client.DownloadFile(" the url with the link to 7zip and file path to where you want it downloaded. answered May 25, 2021 at 16:40 pextrispextris3512 silver badges8 bronze badges You must log in to answer this question. Start asking to get answers Find the answer to your question by asking. Ask question Explore related questions See similar questions with these tags.
2025-03-28CHDconvertConverts a directory containing ".gz", ".7z" and ".zip" files into a directory containing ".chd" files, usually for purposes of console emulation.Requirements (Included with Linux/Mac)PythonGitInstallationPlease select either Method A or Method B to install CHDconvert.Method A: Clone CHDconvertgit clone directory to where you cloned repo (in previous step)cd C:\Where\you\cloned\this\repoInstall requirementspip install -r requirements.txtMethod B: Download Release CHDconvert.7z and change directory to where you unzippedcd C:\Where\you\unzipped\the\releaseInstall requirementspip install -r requirements.txtLinux AdditionalsSome Linux distributions can give you chdman via aptitude with the mame-tools package.Use your distro's package/download manager to get mame-tools (for chdman).eg. Debian-variants using aptsudo apt install mame-toolsUsageExamples:Simply run it, and provide the folder path when it asks for it.Converts every .7z file in given path to chd. Extracts first, outputs to folder name + "_tmp", then converts and output to folder name + "_out"Provide a folder path as an argpython .\chdconvert.py C:\Where\the\7zip\files\liveDoes the same as the aboveProvide the delete arg ("-d" or "--delete")python .\chdconvert.py C:\Where\the\7zip\files\live --deleteSame as above, except it deletes the intermediary "folder_tmp" directoryProvide the replace arg ("-r" or "--replace")python .\chdconvert.py C:\Where\the\7zip\files\live --replaceReplaces the 7zip file, deleting the original as well as the intermediary files in "folder_tmp"ShoutoutsThanks CHDMAN!
2025-04-20The agreed solution is correct, but it actually doesn't help in explaining what you actually need to do!. I read this and many other solutions and I could not find full and complete simple instructions on how to do this.I you are confused like I was, please read my blog post which provides step by step instructions on how to achieve what Molly7244 has posted.How to make a self extracting archive that runs your setup.exe with 7zip -sfx switchIt was brought to my attention that links can become dead so, here are the steps, from my blogStep 1 - Setup your installation folderTo make this easy create a folder c:\Install. This is where we will copy all the required files.Step 2 - 7Zip your installersGo to the folder that has your .msi and your setup.exeSelect both the .msi and the setup.exeRight-Click and choose 7Zip --> "Add to Archive"Name your archive "Installer.7z" (or a name of your choice)Click OkYou should now have "Installer.7z".Copy this .7z file to your c:\Install directoryStep 3 - Get the 7z-Extra sfx extension module from the 7z SDKYou need to download the 7z SDKFollow this link to go to download 7Zip You need to download the 19.00 version (as @ Dec 2019) as the beta does not contain the correct files.A SDK download link. Extract the 7zip SDK files.Copy the file "7zSD.sfx" from the bin directory of the SDK to c:\InstallStep 4 - Setup your config.txtI would recommend using NotePad++ to edit this text file as you will need to encode in UTF-8, the following instructions are using notepad++.Using windows explorer go to c:\Installright-click and choose "New Text File" and name it config.txtright-click and choose "Edit with NotePad++Click the "Encoding Menu" and choose "Encode in UTF-8"Enter something like this:;!@Install@!UTF-8!Title="SOFTWARE v1.0.0.0"BeginPrompt="Do you want to install SOFTWARE v1.0.0.0?"RunProgram="setup.exe";!@InstallEnd@!Edit this replacing [SOFTWARE v1.0.0.0] with your product name.Notes on the parameters and options for the setup file are hereCheckPointYou should now have a folder "c:\Install" with the following 3 files: Installer.7z 7zS.sfx config.txtStep 5 - Create the archiveThese instructions I found on the web but nowhere did it explain any of the 4 steps above.Open a cmd window, Window + R --> cmd --> press enterIn the command window type the followingcd \cd Installcopy /b 7zSD.sfx + config.txt + Installer.7z MyInstaller.exeLook in c:\Install and you will now see you have a MyInstaller.exeYou are finishedRun the installerDouble click on MyInstaller.exe and it
2025-04-13